Screen Printing
Screen Printing @ Scholar Shoppe
|
We have tried to explain the process by using 4W1H method, so that we can take you through each and every aspects of the process which will gudie you and help you to take decision on which process is good for you and suits to your requirement. |
|
This is how we do screen printing at Scholar Shoppe, watch the video. |
|
| What it is? | ||||||||
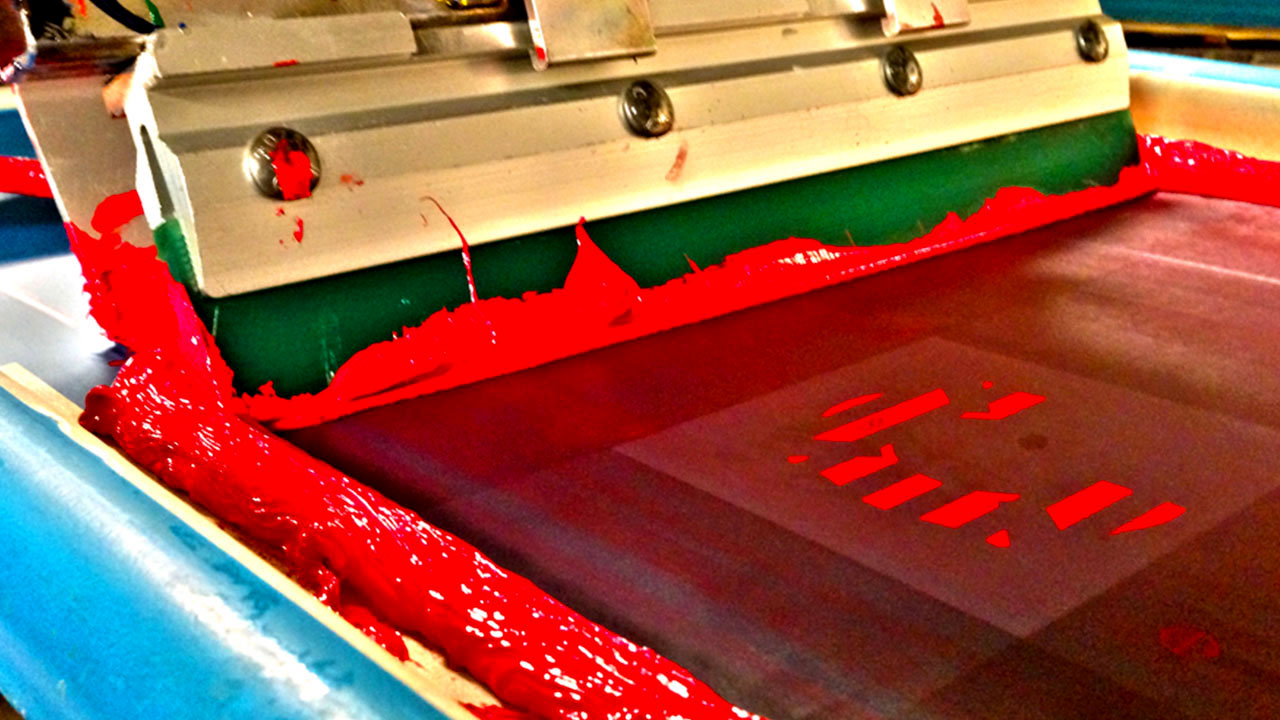
Screen Printing is the most common and old method for printing. Screen Printing is a form of printing in which a thick paste ink is forced through a stencil attached to a finely-woven mesh screen, transferring ink to the desired substrate in those areas not covered by the stencil. Screen printing, also known as screen process and serigraphy, Screen Printing is used to print almost any surface imaginable, from T-shirts and other textiles to posters to signs to tablecloths to shower curtains to leather goods...etc. The screen printing method is ideal for printing high-quality designs, because it guarantees ultimate replication of the design. The screen printing methods gives a product a unique, cute and impressive look that customer love. Screen printing requires a little extra preparation time and materials, and therefore has some minimum order quantities, but it's by far the best option for bright vibrant designs, dark surface, and specialty items. It is very cost effective for high volume of prints. It is not cost effective for less quantity prints.It is not ideal for super complex multi-color designs. | ||||||||
| Why should you use screen print ? | ||||||||
|
No matter how strong the influence digital technology has on the world of graphic design or art, we shouldn’t take for granted the traditional printing processes, such as Screen Printing. Although many new methods of printing have emerged, screen printing remains to be one of the most reliable methods and offers many advantages. There are 4 prime reasons to choose Screen Printing Creates Unique and Authentic Outputs Screen Printing creates unique visual outputs when compared to digital printing. The ink for screen printing is absorbed deeper, providing clearer edges to the image. Screen printing ink can also be applied thicker, resulting in long-lasting, brighter and more vibrant colours even on darker shades. For garment design that requires a high level of vibrancy when printing on dark backgrounds, screen printing is still the best option. Cost-Efficient & Large Volumes Screen printing is more cost-efficient compared to digital printing since it can create large quantities of the design that you want at a faster turnaround. Higher volumes of identical graphics can also be mass produced using the screen printing process, making this the best printing option to use for larger orders. Very Versatile Screen printing accommodates a wide range of materials, including vinyl, fabric, rigid plastic, foam board, metal, glass and many others. The printer can produce different products, such as banners, t-shirts, hats, posters and wallpapers using the same screens. It is also not limited by size or shape, so distinctive shapes like those of mugs and bottles can be designed using this printing method. Provides Long-lasting, High Quality Results The ability of the screen printing ink, like water based inks, to bond over the material of the garment results in a more durable and clearer image compared to digital printing. Heat-dried screen printing inks are also durable enough to handle repeat washing without cracking or fading. Also, additives and coatings can be added to the ink to make it resistant to UV rays, scratches, chemicals and moisture, allowing the products to last for many years. Versatile, durable, cost-efficient and high quality—these are just four of the many reasons why screen printing continues to be the most popular method of printing.. | ||||||||
| When to choose screen print? | ||||||||
|
As explained above the benefits for Screen Printing, but there some criterias to choose the printing technique. This is a technique which requires time to set up the machine and create the screen(s) but once these are in place, the production process is faster. While there are setup charges and minimum order quantities, but the price per unit is the lowest overall.
| ||||||||
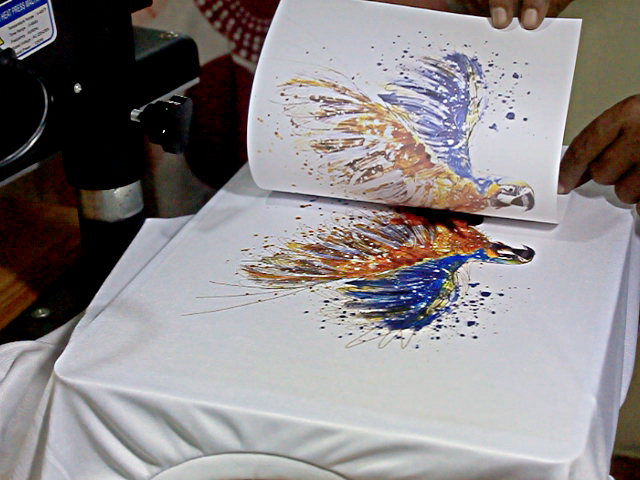
| How Screen Printing is done ? | ||||||||
| ||||||||
| Who can do it for you ? | ||||||||
Scholar Shoppe has wide experience in printing, design and art techniques. Anyone like Students, Institutions, Corporates, Designers, Freelancers and Busienss owners can use Scholar Shoppe's experience to bring their imagination to reality. Our printing experts are highly trained so they can offer a personalised attention to each and every one of our clients. If you are needing help with your design? Then you’re in luck because our graphic design team will offer their hand with any issue you may have with graphics. Our cutting-edge software allows us to match your Pantone colours exactly so that the final printed version look like what you envisioned, also we make sure the same quality will prevail across all the units in the order. Our catalogue features a wide variety of products diectly from manufacturers, so no third party to add up the cost. Scholar Shoppe aggregates of diffrent products for different comunities, so you can use this advantage to save your cost. As we offer best screen printing technique in India, we offer both water-based and plastisol inks. They are eco-friendly, durable and create a crisp print which lasts longer even after many wash. Our standard delivery is from 7 to 10 days, while the express option will ship your garments in 2 days. (If you’re interested in the 2 days option, please make sure to place your order before 12.00 midday and also please be in touch with our representatives to check the exact schedule.) |
||||||||


| How to prepare for Screen Printing - The Basics | ||
 300 DPIIf you ensure that your artwork is at 300dpi, at the desired print size. Then you can guarantee that it'll be at a high enough resolution to print. |
 TEXT to OUTLINEIf you convert all text to outlines, then we won't have to relocate any fonts, so they'll be as you designed them for print. |
 FILE FORMATVector based files (e.g. AI, CRD, SVG files) work best for us, as they have no loss of resolution. You can also provide PNG, JPG or PDF files of high resolution of your artwork. |
| Screen Printing Artwork Guidelines | |
Learn how to prepare your artwork for Screen Printing We know everyone does not speak graphic design fluently, Scholar Shoppe is here to translate your idea to reality. We have tried to take this tedious process and simplify it into this easy to follow PDF, which is available for download. Do you still need some extra guidance? Do not worry Contact us and we will prepare the artwork for you. | |
| Which Printing Technique is best for me? | |||||
|
Which technology suits best to your requrement? Still are you in confusion to choose the technology which suits best to your requirement? No worry ! We have tried to make an infography for you which will guide you to choose the best technology for your printing requirement. Please click the below button to open the infography. If thenafter you need any help or guide from us, please call us or mail us, our experts will be happy to help you. |
|||||
DIRECT TO GARMENT
PRINTING
DTG Printing @ Scholar Shoppe
|
We have tried to explain the process by using 4W1H method, so that we can take you through each and every aspects of the process which will gudie you and help you to take decision on which process is good for you and suits to your requirement. |
|
This is how we do DTG printing at Scholar Shoppe , watch the video. |
|
| What it is? | |||||||
|
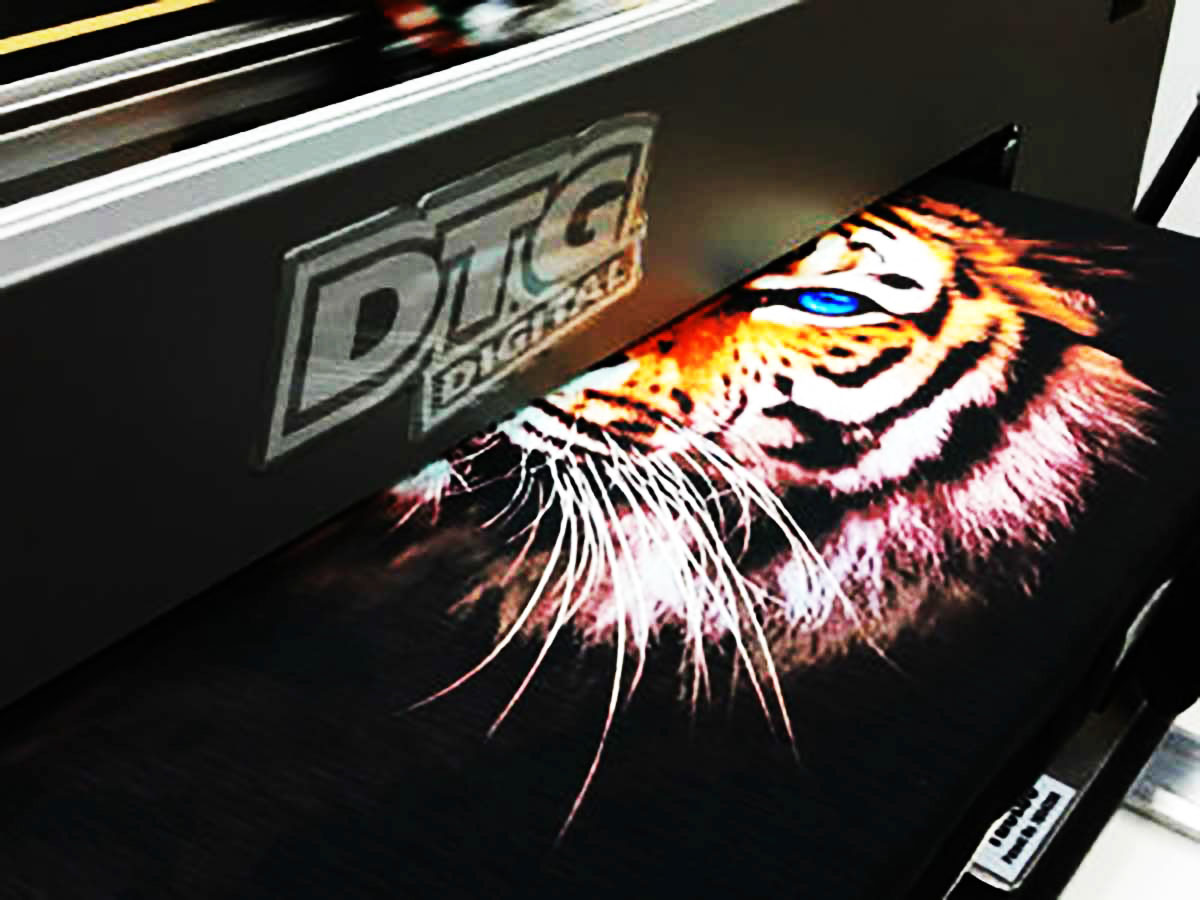
We use DTG (direct to garment printing) for small orders with complex designs. Using the latest printing technology, we can print full-colour images on a wide range of T-Shirts, hoodies and other types of garments. Details can make the difference in a great design. For products with a high level of detail, including photos, there’s no better way to go than digital printing. DTG works like a paper printer in the office. The only difference is that, in this case the ink is going to the fabric. It takes the uploaded design from the computer to print, which then creates uniqueness and creativity. Since it’s done from computer, it does not require physical setup cost, so there is no minimum quantity restriction. Any quantity can be printed.
But it’s not cost effective for high volume prints. As DTG used water based ink, its fades slowly after few washes; it can survive 40-50 washes. | |||||||
| Why should you use DTG Printing? | |||||||
|
With several, quality methods available to create impressive, custom apparel garments, direct-to-garment (DTG) printing is a newer technique gaining recognition among printers. DTG printing uses a custom inkjet printer to apply water-based inks directly to the textile. The garment’s fibers then absorb the liquid. The process is like to printing a document at home — replace paper with garments. The outcome is some seriously impressive designs customers go crazy for. There are 4 main reasons to use the DTG printing technology Vibrant, Highly Detailed DesignsCompared to traditional printing methods, DTG printers can create lively, photo-realistic images by firing smaller droplets of ink — allowing for more detail. These printers also use the full spectrum of colors, with the ability to print them simultaneously, making them perfect for colorful designs or artwork with shading and gradients. On-Demand Printing Unlike screenprinting, which requires a lot of setup and squeegeeing each color of ink separately, DTG printing entails little-to-no setup and can avail a multicolor design at the press of a button. There is no time-consuming manual labor involved, a small-batch custom order can be delivered the same day. This improves the customer experience by having a quick turnaround time. Soft Touch As DTG printing uses water-based inks to print the designs which inkjects ink directly to the textile. As the inks are water-based and its mixed with textile, it gives a soft touch feeling, its not like other technologies which gives a touch of hard feeling. Cost effective & Small Volumes It's very cost effective for small volume of work loads, its becuase it does not require any setup time and cost. Just ready, set and go. That's why its called on demand delivery technology. It does not require any technical skill to use the technology. It's simple process makes it beautiful to work with. | |||||||
| When to choose DTG Printing? | |||||||
|
Because the inks used for DTG are water-based, they can fade a bit after a few washes. This technique is often used to create vintage-looking printing for this reason. If you are looking for a vibrant and colourful print for a long time, and it is important for you. Then we would recommend using screen printing instead of DTG.
When to choose Direct to Garment Printing (DTG):-
| |||||||
| How DTG Printing is done ? | |||||||
| |||||||
| Who can do it for you ? | |||||||
Scholar Shoppe experience is a modern take on DTG printing. With a strong hold on printing techniques and a creative mindset, we take care of customer needs very closely whether it's big or small order. We have always prioritised the customer experience, that's why from the first contact, our clients get assigned their very own printing expert who will guide them through the entire process. They are highly trained so they can offer a personalised attention each and every time. Not only the printing technology but if you need help with your artwork, our graphic design team will offer their hand as well. Artwork must be managed differently for every printing technique. For example, DTG requires high-quality images. It does not necessarily need them to transfer into vectors like other techniques. Our standard delivery is from 7 to 10 days, while the express option will ship your garments in 2 days. (If you’re interested in the 2 days option, please make sure to place your order before 12.00 midday and also please be in touch with our representatives to check the exact schedule.) |
|||||||


| How to prepare for DTG Printing - The Basics | ||
300 DPIIf you ensure that your artwork is at 300dpi, at the desired print size. Then you can guarantee that it'll be at a high enough resolution to print. |
TEXT to OUTLINEIf you convert all text to outlines, then we won't have to relocate any fonts, so they'll be as you designed them for print. |
FILE FORMATVector based files (e.g. AI, CRD, SVG files) work best for us, as they have no loss of resolution. You can also provide PNG, JPG or PDF files of high resolution of your artwork. |
| DTG Printing Artwork Guidelines | |
Learn how to prepare your artwork for DTG Printing We know everyone does not speak graphic design fluently, Scholar Shoppe is here to translate your idea to reality. We have tried to take this tedious process and simplify it into this easy to follow PDF, which is available for download. Do you still need some extra guidance? Do not worry Contact us and we will prepare the artwork for you. | |
| Which Printing Technique is best for me? | |||||
|
Which technology suits best to your requrement? Still are you in confusion to choose the technology which suits best to your requirement? No worry ! We have tried to make an infography for you which will guide you to choose the best technology for your printing requirement. Please click the below button to open the infography. If thenafter you need any help or guide from us, please call us or mail us, our experts will be happy to help you. |
|||||
DYE SUBLIMATION
Dye Sublimation Printing @ Scholar Shoppe
|
We have tried to explain the process by using 4W1H method, so that we can take you through each and every aspects of the process which will gudie you and help you to take decision on which process is good for you and suits to your requirement. |
|
| What it is? | ||||||||
|
Like Direct to Garment (DTG) printing, it uses computer to print the design to a paper first and then the design is transferred to the surface by layering the printed paper on the surface of the material by applying the appropriate heat and pressure on it. It is fully automatized process which involves little manual works. Since it uses computer printing, it produces high quality detailed color output. So the design looks great. It uses a special type of ink. When the solid fabric is exposed to heat and pressure it turns into gas. The fabric molecules then expand and the gas sips between the gaps that appear in the cloth. In the end, the molecules contracts again when you remove the heat. This type printing is ideal for high quantity production enviornment and cost effective too. The print lasts long and stays till the fabric lasts. It’s best for polyester materials which produces great detailed result. It’s ideal for sports type garments, advertising materials, household garments etc. Demerit of this method is, it produces good results on white (mostly) or very light color materials, not on dark color materials as it does not use white ink like DTG printing. It works on poly-coated or polypropylene (PP) type materials | ||||||||
| Why should you use Dye Sublimation Printing? | ||||||||
|
By using a Dye-Sublimation Printer, you don’t simply paste an image to a surface, but infuse a medium with the image’s color and vibrancy. Unlike a traditional printer where dye is laid onto a grid of individual dots, dye sublimation vapors pass through pixel gradation, giving an image a more natural, smooth look. Grand format dye sublimation printing can, therefore, heighten visual quality on large scale surfaces, such as fabrics, billboards, and graphic displays There are many benefits of Dye-Sublimation printing, the main 4 reasons mentioned below Long lasting printed colors Dye sublimation printing will give you the longest lasting color in your fabric of any type of printing available on fabric. The best national flags are made of polyester because they are color fast and wind resistant. Best fabric printing method. The best printing method on clothing is dye sublimation printing because there is no ink buildup that will prevent wicking of moisture away from the body. On fabric graphic displays, or art reproductions that are used indoors, the colors are guaranteed to last for 30 years or longer because they are encased in the sealed polymer cells. The dyes won’t easily fade. Another benefit of dye sub printed polyester fabric banners or displays or clothing is that you can wash them for years and not lose any color. Even if you dry your clothes in the sun, the colours dont fade away. Colored-rich prints. Finally, although there are other benefits we could point to as well, the benefit is the richness of the color print on the polyester fabric. Because it is printed on paper first and then transferred to the garment, the tones blend into each other, creating a photographic quality to the prints, unparalleled by any other printing process. | ||||||||
| When to choose Dye Sublimation Printing? | ||||||||
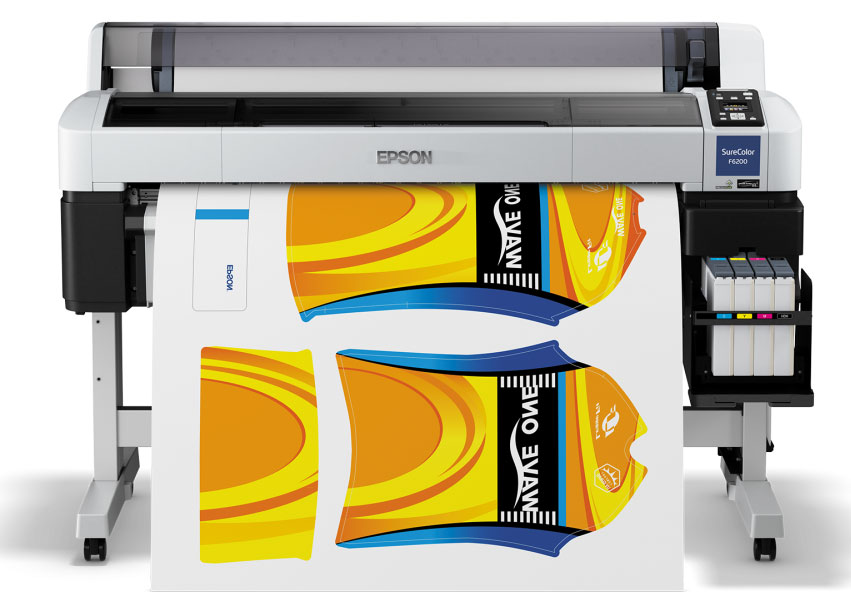
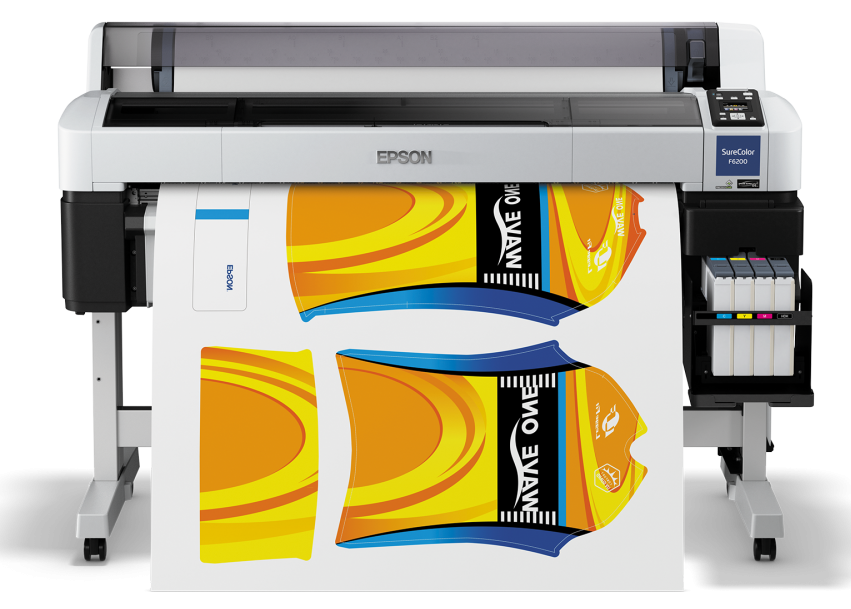
|
Dye sublimation printing is, by definition, the sublimating of dye in fabric. The way it works is like this. First, a transfer paper is printed on a digital printer that is set up with CMYO dye cartridges rather than your typical CMYK inks. CMYK, or four color process printing is used in surface printing of materials, including direct-to-fabric printing, but does not become part of the fabric like dye sub printing does. As it is sublimated and its part of the fabric, so it does not fade away and lasts till the fabric lasts. Due to transfer of designs to the fabric directly, it produces reachness of colours which gives a crisp and clear print. Here are some cases where you can choose dye sublimation printing.
| ||||||||
| How is done ? | ||||||||
| ||||||||
| Who can do it for you ? | ||||||||
Scholar Shoppe experience is a modern take on Dye Sublimation printing. With a strong hold on printing techniques and a creative mindset, we take care of customer needs very closely whether it's big or small order. We have always prioritised the customer experience, that's why from the first contact, our clients get assigned their very own printing expert who will guide them through the entire process. They are highly trained so they can offer a personalised attention each and every time. Not only the printing technology but if you need help with your artwork, our graphic design team will offer their hand as well. Artwork must be managed differently for every printing technique. For example, Dye-Sublimation requires high-quality images. It does not necessarily need them to transfer into vectors like other techniques. Our standard delivery is from 7 to 10 days, while the express option will ship your garments in 2 days. (If you’re interested in the 2 days option, please make sure to place your order before 12.00 midday and also please be in touch with our representatives to check the exact schedule.) |
||||||||


| How to prepare for Dye Sublimation Printing - The Basics | ||
300 DPIIf you ensure that your artwork is at 300dpi, at the desired print size. Then you can guarantee that it'll be at a high enough resolution to print. |
TEXT to OUTLINEIf you convert all text to outlines, then we won't have to relocate any fonts, so they'll be as you designed them for print. |
FILE FORMATVector based files (e.g. AI, CRD, SVG files) work best for us, as they have no loss of resolution. You can also provide PNG, JPG or PDF files of high resolution of your artwork. |
| Dye Sublimation Printing Artwork Guidelines | |
Learn how to prepare your artwork for Dye Sublimation Printing We know everyone does not speak graphic design fluently, Scholar Shoppe is here to translate your idea to reality. We have tried to take this tedious process and simplify it into this easy to follow PDF, which is available for download. Do you still need some extra guidance? Do not worry Contact us and we will prepare the artwork for you. | |
| Which Printing Technique is best for me? | |||||
|
Which technology suits best to your requrement? Still are you in confusion to choose the technology which suits best to your requirement? No worry ! We have tried to make an infography for you which will guide you to choose the best technology for your printing requirement. Please click the below button to open the infography. If thenafter you need any help or guide from us, please call us or mail us, our experts will be happy to help you. |
|||||
HEAT TRANSFER
Heat Transfer Printing @ Scholar Shoppe
|
We have tried to explain the process by using 4W1H method, so that we can take you through each and every aspects of the process which will gudie you and help you to take decision on which process is good for you and suits to your requirement. |
|
This is how we do heat transfer printing at Scholar Shoppe , watch the video. |
|
| What it is? | |||||||
|
Like Direct to Garment (DTG) printing, it uses computer to print the design to a paper first and then the design is transferred to the surface by layering the printed paper on the surface of the material by applying the appropriate heat and pressure on it. Since it uses computer printing, it produces high quality detailed color output. So the design looks great. The only difference between Dye-Sublimation printing and heat transfer is - Dye Sublimation printing is mostly used for fabric or polycoated materials for big formats, where as heat transfer is used for small format prints like T Shirts, Coffee Mugs, Water Bottles, personalised products and gifting items etc. or any material having poly coated can be used for heat transfer too. It uses a special type of ink. When the solid fabric is exposed to heat and pressure it turns into gas. The fabric / poly coated materials molecules then expand and the gas sips between the gaps that appear in the cloth / poly coated materials . In the end, the molecules contracts again when you remove the heat. This type printing is ideal for any quantity and cost effective. The print lasts long and stays till the materia lasts as it becomes the part of the materials. It’s best for polyester materials which produces great detailed result. It’s ideal for sports type garments. You can use cotton or mix cotton materials for heat transfer too by using special transfer papers. Demerit of this method is, its produces good results on white or very light color materials not on dark color materials. | |||||||
| Why should you use Heat Transfer Printing? | |||||||
|
By using Heat Trasnfer Printing, you don’t simply paste an image to a surface, but infuse a medium with the image’s color and vibrancy. Unlike a traditional printer where dye is laid onto a grid of individual dots, heat transfer vapors pass through pixel gradation, giving an image a more natural, smooth look. Detailed format heat transfer printing can produce lots of items like T Shirts, Coffee Mugs, Water Bottles, Personalised items, Gift items etc. There are many benefits of Heat Transfer Printing, the main 5 reasons mentioned below Long lasting printed colors Heat Transfer printing will give you the longest lasting color in your fabric or any type of poly coated items available. Heat transfer printing is not printing on surface of the materials, its actually a photo transfer to the materials, so it becomes part of the material, that's why they are color fast and lasts till the material lasts or destroyed. Best fabric printing method. The best printing method on clothing is dye sublimation printing because there is no ink buildup that will prevent wicking of moisture away from the body. On fabric graphic displays, or art reproductions that are used indoors, the colors are guaranteed to last for 30 years or longer because they are encased in the sealed polymer cells. The dyes won’t easily fade. Another benefit of heat transfer printed on polyester fabric or poly coated materials is that you can wash them for years and not lose any color. Even if you dry your clothes in the sun, the colours dont fade away. Colored-rich prints. Finally, although there are other benefits we could point to as well, the benefit is the richness of the color print on the polyester fabric or poly coated items.Because it is printed on paper first and then transferred to the garment, the tones blend into each other, creating a photographic quality to the prints, unparalleled by any other printing process. Can be used on Cotton / Mix cotton items Heat transfer can be used on cotton or mix cotton fabrics too by using special transfer papers. Even you can use heat transfer printing on dark coloured cotton / mix-cotton fabrics too. You can enjoy the detailed printing on these materials too. | |||||||
| When to choose Heat Transfer Printing? | |||||||
|
Heat trasnfer printing is, by definition, the sublimating of dye in fabric or poly coated materials. The way it works is like this. First, a transfer paper is printed on a digital printer that is set up with CMYO dye cartridges rather than your typical CMYK inks. CMYK, or four color process printing is used in surface printing of materials, including direct-to-fabric printing, but does not become part of the fabric like heat transfer printing does. As it is sublimated and its part of the fabric, so it does not fade away and lasts till the fabric lasts. Due to transfer of designs to the materials directly, it produces reachness of colours which gives a crisp and clear print. Here are some cases where you can choose heat transfer printing.
| |||||||
| How is done ? | |||||||
| |||||||
| Who can do it for you ? | |||||||
|
Scholar Shoppe experience is a modern take on Heat Transfer printing. With a strong hold on printing techniques and a creative mindset, we take care of customer needs very closely whether it's big or small order. We have always prioritised the customer experience, that's why from the first contact, our clients get assigned their very own printing expert who will guide them through the entire process. They are highly trained so they can offer a personalised attention each and every time. Not only the printing technology but if you need help with your artwork, our graphic design team will offer their hand as well. Artwork must be managed differently for every printing technique. For example, Heat transfer requires high-quality images. It does not necessarily need them to transfer into vectors like other techniques. Our standard delivery is from 7 to 10 days, while the express option will ship your garments in 2 days. (If you’re interested in the 2 days option, please make sure to place your order before 12.00 midday and also please be in touch with our representatives to check the exact schedule.) |
|||||||


| How to prepare for Heat Transfer Printing - The Basics | ||
300 DPIIf you ensure that your artwork is at 300dpi, at the desired print size. Then you can guarantee that it'll be at a high enough resolution to print. |
TEXT to OUTLINEIf you convert all text to outlines, then we won't have to relocate any fonts, so they'll be as you designed them for print. |
FILE FORMATVector based files (e.g. AI, CRD, SVG files) work best for us, as they have no loss of resolution. You can also provide PNG, JPG or PDF files of high resolution of your artwork. |
| Heat Transfer Printing Artwork Guidelines | |
Learn how to prepare your artwork for Heat Transfer Printing. We know everyone does not speak graphic design fluently, Scholar Shoppe is here to translate your idea to reality. We have tried to take this tedious process and simplify it into this easy to follow PDF, which is available for download. Do you still need some extra guidance? Do not worry Contact us and we will prepare the artwork for you. | |
| Which Printing Technique is best for me? | |||||
|
Which technology suits best to your requrement? Still are you in confusion to choose the technology which suits best to your requirement? No worry ! We have tried to make an infography for you which will guide you to choose the best technology for your printing requirement. Please click the below button to open the infography. If thenafter you need any help or guide from us, please call us or mail us, our experts will be happy to help you. |
|||||

EMBROIDERY
Embroidery @ Scholar Shoppe
|
We have tried to explain the process by using 4W1H method, so that we can take you through each and every aspects of the process which will gudie you and help you to take decision on which process is good for you and suits to your requirement. |
|
| What it is? | ||||||||
|
Embroidery is the craft of decorating fabric or other materials using a needle to apply thread or yarn. Embroidery may also incorporate other materials such as pearls, beads, quills, and sequins. In modern days, embroidery is usually seen on caps, hats, coats, blankets, dress shirts, denim, dresses, stockings, and golf shirts. Embroidery is available with a wide variety of thread or yarn color. The texture effect of your design cannot be achieved by any of the printing methods. And the durability lasts for year after year. That’s why embroidery is popular. Your designs are designed on the computer first and then sent it to the embroidery machine to stitch it on the materials. Multi color threads stitched at the same time. After finishing the stitching of your designs, the trimming of unnecessary threads are done manually before it’s sent to you. It does not require dry process. Embroidery is not advisable on thin soft materials or fabric that stretches too much like Lycra. Few color details designs comes well in stitching type. It’s cost effective for large quantities. | ||||||||
| Why should you use Embroidery? | ||||||||
|
The texture effect of your design cannot be achieved by any of the printing methods. And the durability lasts for year after year. That’s why embroidery is popular.
Here are few reasons that will explain you that - why you should use embroidery. Proffessionalism Many corporate offices and small business use embroidery for their company clothing because it creates a clean, professional look ideal for spreading the company name. Whether you use it for staff uniforms or promotional products, your embroidered logo will make a lasting impression. Texture feel The texture effect of your design cannot be achieved by any of the printing methods. You can touch and feel it by closing your eyes as it's 3D one. The colour of the threads which used for embroidery are hard to match with the inks used for printing wihch adds value to its elegant look. Durability Embroidery is known for being extremely durable, so your design will remain intact for years to come. Unlike screen printing or laser printing, which can fade with age and wash cycles, embroidery has the potential to last a lifetime. Wide variety Embroidery isn’t just for T-shirts. You can embroider bags, sweatpants, backpacks, socks, jackets, and more. You can customize your embroidery of your logo, name, tag, picture etc to make attactive and eye-catching. Colour and Style Advancements in embroidery have created a limitless selection of colors and styles. Whether you’d like a colorful picture, a company logo, or a name embroidered in a custom typeface, every detail is at the mercy of your vision. | ||||||||
| When to choose Embroidery? | ||||||||
|
When we first think of embroidery, we often think of the left-chest logo on a polo shirt or top of the back pack bags. The most typical areas you may consider for embroidery are: School uniforms, Work uniforms, Sportswear, Caps, T shirts, Bags, Personalised items and more for any purpose The advantages of embroidery are the best answer for it. You may use embroidery option when :-
| ||||||||
| How is done ? | ||||||||
| ||||||||
| Who can do it for you ? | ||||||||
|
Scholar Shoppe experience is a modern take on Embroidery. With a strong hold on printing techniques and a creative mindset, we take care of customer needs very closely whether it's big or small order. We have always prioritised the customer experience, that's why from the first contact, our clients get assigned their very own printing expert who will guide them through the entire process. They are highly trained so they can offer a personalised attention each and every time. Not only the printing technology but if you need help with your artwork, our graphic design team will offer their hand as well. Artwork must be managed differently for every printing technique. For example, emroidery requires high-quality images. It necessarily needs them to transfer into vectors like Screen printing techniques. Nowadays, we also offer 3D embroidery. This special kind works with foam to create a design that elevates itself a few cm from its canvas. It looks different but not to a degree that it doesn’t read as embroidery anymore. Not many are using it yet so it is a great way to stand out. If you’re interested in our embroidery services, please, contact our experts. We will help with every step of the process, starting with the artwork creation and digitising process. |
||||||||


| How to prepare for Embroidery - The Basics | ||
300 DPIIf you ensure that your artwork is at 300dpi, at the desired print size. Then you can guarantee that it'll be at a high enough resolution to print. |
TEXT to OUTLINEIf you convert all text to outlines, then we won't have to relocate any fonts, so they'll be as you designed them for print. |
FILE FORMATVector based files (e.g. AI, CRD, SVG files) work best for us, as they have no loss of resolution. You can also provide PNG, JPG or PDF files of high resolution of your artwork. |
| Embroidery Artwork Guidelines | |
Learn how to prepare your artwork for Embroidery We know everyone does not speak graphic design fluently, Scholar Shoppe is here to translate your idea to reality. We have tried to take this tedious process and simplify it into this easy to follow PDF, which is available for download. Do you still need some extra guidance? Do not worry Contact us and we will prepare the artwork for you. | |
| Which Printing Technique is best for me? | |||||
|
Which technology suits best to your requrement? Still are you in confusion to choose the technology which suits best to your requirement? No worry ! We have tried to make an infography for you which will guide you to choose the best technology for your printing requirement. Please click the below button to open the infography. If thenafter you need any help or guide from us, please call us or mail us, our experts will be happy to help you. |
|||||

VINYL CUT PRINTING
Vinyl Cut Printing @ Scholar Shoppe
|
We have tried to explain the process by using 4W1H method, so that we can take you through each and every aspects of the process which will gudie you and help you to take decision on which process is good for you and suits to your requirement. |
|
This is how we do CAD-Cut-Vinyl printing at Scholar Shoppe , watch the video. |
|
| What it is? | ||||||||
|
If you want your designs to look standout, it’s the best option. It produces better results and durability is very high in comparison to screen printing. You can say its alternative to screen printing but with limitation. Actually it’s not printing, it’s like sticker pasting. These vinyls are specialized vinyl which is layered of PU on a protected sheet. It’s also called CAD Cut Vinyl or Heat Transfer Vinyl. Your designs are cut via plotter cutter by using computer for each color. Then weeding out the unnecessary area, then paste it on the materials and apply heat in heat press to stick permanently. Good part of vinyl cut is, it can be applied with any materials even where the other printing methods don’t work. The smooth edge cutting gives a special effect to the design. The extra effects which you cannot perform on other printing methods you can do it here, like glittering, Sign glow, Metallic etc. The printing durability is very high and it’s stretchable. The demerit is, it cannot produce very complex or very detailed designs. Clipart or Silhouette type designs with limited details works perfect. It’s good option for less quantity and quick delivery like Direct to Garment printing. It’s cost effective for fewer quantities up to 10-20 pieces. | ||||||||
| Why should you use Vinyl Cut Printing? | ||||||||
|
Heat Transfer Vinyl (HTV) is very different from silkscreening because silkscreening produces many different colors stacked and mixed into each other. Vinyl, on the other hand, involves single colors per section. Also, each layer has different qualities. This is what sets vinyl apart from a typical screen-printed t-shirt design and material. Here are few reasons of CAD-cut vinyl which tells you why you should use CAD-cut-Vinyl
Ready to deliver Unlike other printing techniques like screen printing, CAD-cut vinyl has no setup costs which is why it is a great choice for small and one-off orders. It’s also quick which allows us to act fast when there’s a need for a rush order.
Can be applied on any type of materials Cad Cut vinyl is versatile and can be used on almost any material and/or product where other printing technique can not do. May it be polyester, cotton, plasitics, PU, PVC, Leather, Metal etc. it can be used on dark-coloured garments without the need of a pre-treatment step or the white layer of ink that screen printing and DTG need in order to work.
Durability The great thing about CAD-Cut Vinyl is that it lasts a lifetime. It lasts till the material exists. Along with its elegant cute finish it does not fade away after many washes or cracks after some time use, like other printing techniques such as Screen or DTG. As its made of PU, its stretchable too, that's why you will not find cracks after using it many times Cut Edge Finish Because of its cut edge finish, CAD-Cut vinyl provides you with extreme flexibility as far as looks and texture are concerned, compared to traditional ink printing. In fact, there is no comparison at all. If you want to create eye-catching t-shirts and make the wearer the center of attention, you may adopt to consider producing t-shirts using the Heat Transfer Vinyl technique. Creative freedom What makes it difference from other methods of personalisation is that it works on garments that have been previously printed. This allows a great deal of creative freedom.Extra Finish In order to customise, even more, there are very different kinds of vinyl. For those who’re looking for a more stylish effect like glitter, glow, metalic, reflect etc, they can achive it only in this technology, its almost not possible to achieve it in other printing techniques. There are special types of vinyl like Airflow which allows for more breathability and Thermo-Film which regulate the temperature which you can use as per your need. | ||||||||
| When to choose Vinyl Cut Printing? | ||||||||
|
As we discussed above about the unique advantages of CAD-Cut Vinyl printing technique,here we will guide you when to choose this technique for your requirement
| ||||||||
| How is done Vinyl Cut Printing? | ||||||||
| ||||||||
| Who can do it for you ? | ||||||||
|
Scholar Shoppe experience is a modern take on CAD-Cut Vinyl printing. With a strong hold on printing techniques and a creative mindset, we take care of customer needs very closely whether it's big or small order. We have always prioritised the customer experience, that's why from the first contact, our clients get assigned their very own printing expert who will guide them through the entire process. They are highly trained so they can offer a personalised attention each and every time. Not only the printing technology but if you need help with your artwork, our graphic design team will offer their hand as well. Artwork must be managed differently for every printing technique. For example, CAD-Cut Vinyl requires high-quality images. It necessarily needs them to transfer into vectors like Screen printing techniques. Our standard delivery is from 7 to 10 days, while the express option will ship your garments in 2 days. (If you’re interested in the 2 days option, please make sure to place your order before 12.00 midday and also please be in touch with our representatives to check the exact schedule.) |
||||||||


| How to prepare for CAD-cut Vinyl Printing - The Basics | ||
300 DPIIf you ensure that your artwork is at 300dpi, at the desired print size. Then you can guarantee that it'll be at a high enough resolution to print. |
TEXT to OUTLINEIf you convert all text to outlines, then we won't have to relocate any fonts, so they'll be as you designed them for print. |
FILE FORMATVector based files (e.g. AI, CRD, SVG files) work best for us, as they have no loss of resolution. You can also provide PNG, JPG or PDF files of high resolution of your artwork. |
| Vinyl Cut Printing Artwork Guidelines | |
Learn how to prepare your artwork for CAD-Cut-Vinyl We know everyone does not speak graphic design fluently, Scholar Shoppe is here to translate your idea to reality. We have tried to take this tedious process and simplify it into this easy to follow PDF, which is available for download. Do you still need some extra guidance? Do not worry Contact us and we will prepare the artwork for you. | |
| Which Printing Technique is best for me? | |||||
|
Which technology suits best to your requrement? Still are you in confusion to choose the technology which suits best to your requirement? No worry ! We have tried to make an infography for you which will guide you to choose the best technology for your printing requirement. Please click the below button to open the infography. If thenafter you need any help or guide from us, please call us or mail us, our experts will be happy to help you. |
|||||