

Welcome to Scholar Shoppe Design Studio Documentation
You can manage and guide yourself by this document.
Scholar Shoppe has everything for it's customers need to design better from one easy to use online tool.
Documentation
To design a product with base product, Scholar Shoppe provides the Design Studio on the frontend. Which allows customers add text, images, clipart to a product.
Bellow that is a screen for that Design Studio:

But before going to this editor, you have to select a product from the website or a popup product to show up when you access editor directly.
Let’s go through parts of Design Studio:
Resources
The resource is placed, you can add texts, templates, cliparts and shapes, you also can upload your own image to add to your design. Of course, in here you can see the product info and attributes or printing methods as well.
We have tabs bellow:
Let’t check each of them.
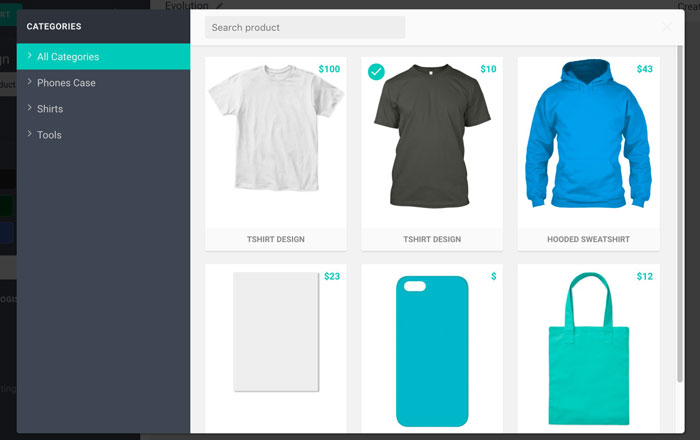
Product Info
This tab includes product info and attribute. From here you can change to other product quick as quick via Change Product button. There are colors options for you to select to add to your product. Avialable colours of the products are configured accordingly for your use. if any specific colour you require, you may request us to help you. When you change an attribute or select printing method the price is updated automatically.
To add a product to cart, just press Add To Cart button. After adding to cart, you can change design or attribute but the cart info is not updated with new changes unless you press the Update Cart button.
Printing Methods (4 Nos)
There are 4 printing meethods are configured for you. Each product is configured with available printing technique(s) for it. You can choose wisely which printing method is best for you. You can click on details on each printing method to get quick knowledge. If you want to know more about each printing technique, please visit our detailed ART WORK GUIDE page.
Here are 4 Printing Methods for you.
- Screen Printing - Classic and Oldeest method
- Sublimation Printing - Detailed, photo type
- CAD-Cut Vinyl Printing - Finest and elegant finish, metalic finish
- Embroidery - 3D stitches with threads

You can change the printing methods anytime before add to cart after reviewing the cost (Price calculation formula on Product Tab.)
Note:- After designing of your product, If you see the product price is 0 (Zero), it means you are using more colours beyond the printing-method you selected. You can find it easily from the below image. You can change printing-methods to view the cost too.

Tips:- Keep your design simple and use less colours to get cost effective product.
Templates (310+ Nos)
This tab includes templates which uploaded from admin panel by Scholar Shoppe. Some of them are chargable and some are free to use.
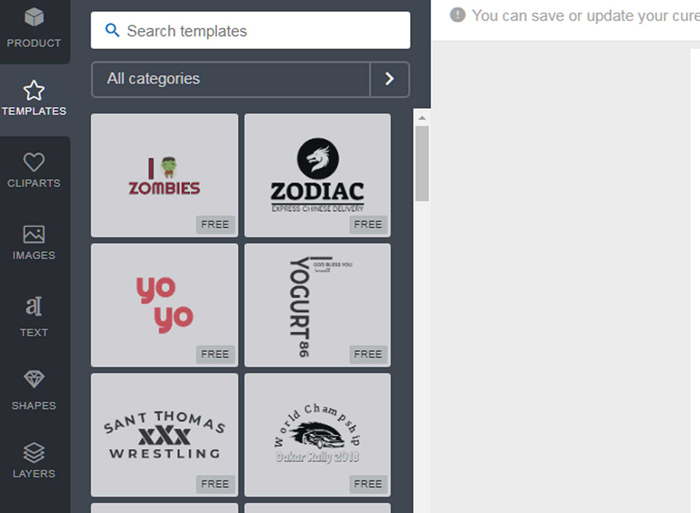
This tab allows customer reach to ideas they want to use via the search box and categories filter.
To view more details about template just mouseover the (i) icon, the big viewer shows up with more template details such as name, price, tags,…
To add template to the design area, just click on them.
Layers

All layers which you added to design are displayed on this tab. You can show/hide layers via visibility option. Or delete layers.
To change order to back or forward other layers, just drag and drop them.
Lock/Unlock layers to Disable/Enable modify tools on that one.
Text (1000+ Fonts)
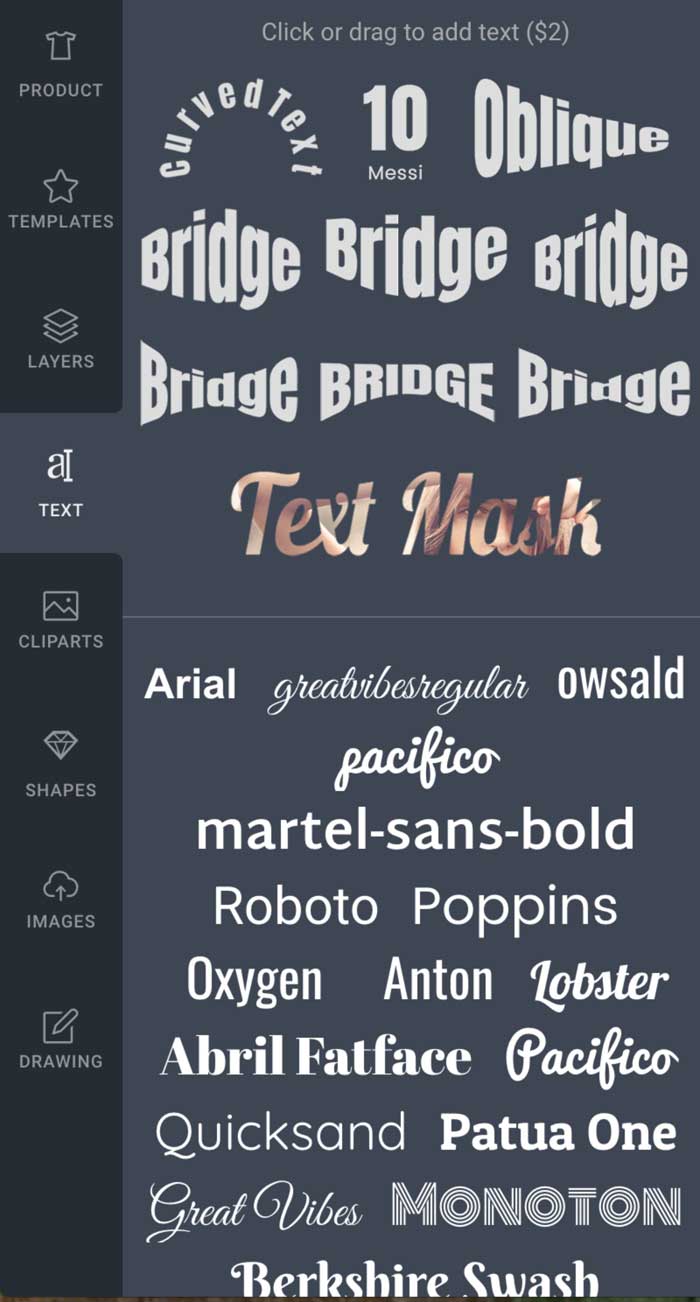
To use text on your design, just reach to this tab and select pre-made texts or select font style you want to add then click to add them.
To show more font styles, just press Load more 1000+ Fonts the new popup show up which allow you add more fonts to list.
View screenshot for more details
Cliparts (3300+ Nos)
This tab includes images which uploaded from admin panel by Scholar Shoppe.

This tab allows customer reach to ideas they want to use via the search box and categories filter.
To view more details about clipart just mouseover the (i) icon, the big viewer shows up with more clipart details such as name, price, tags,…
To add clipart to the design area, just click on them.
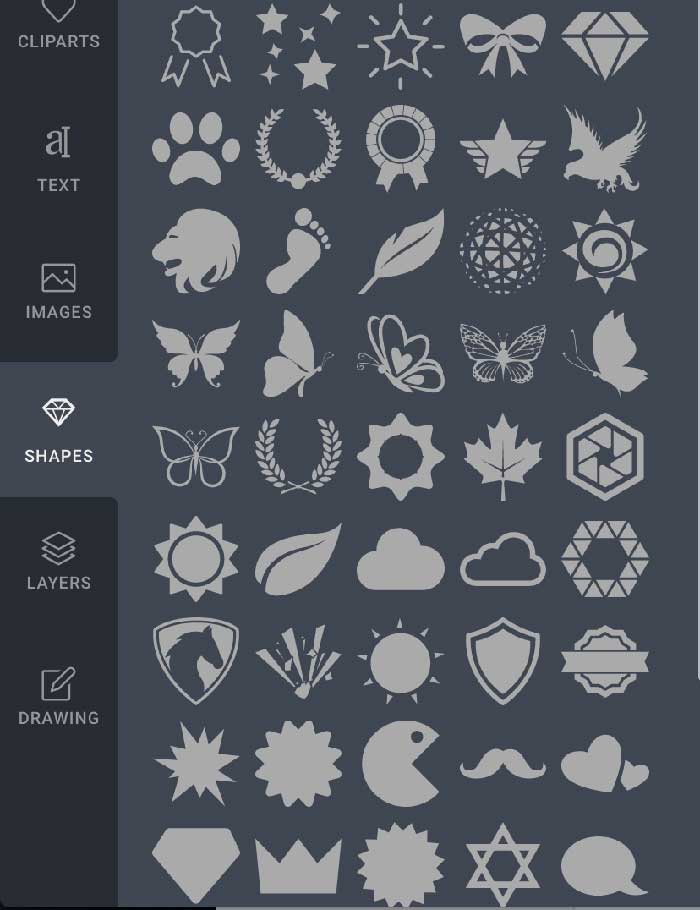
Shapes (100+ Nos)
Similar to Clipart, this tab allow customer reach to ideas they want to use via the search box and categories filter. But shapes are vector format which allows design have smooth details when zoom or export to big size without mess up.
To add shapes to the design area, just click on them., You can add text or images on top of the shapes if required.
Images
This tab, allows you upload your own images, or get them from your social account or from some image stocks such as pixabay, openclipart etc.

To use them, just click on them to add to Design Studio.
Drawing
This tab is setting to prepare draw info. You can select a color, size of the bush.
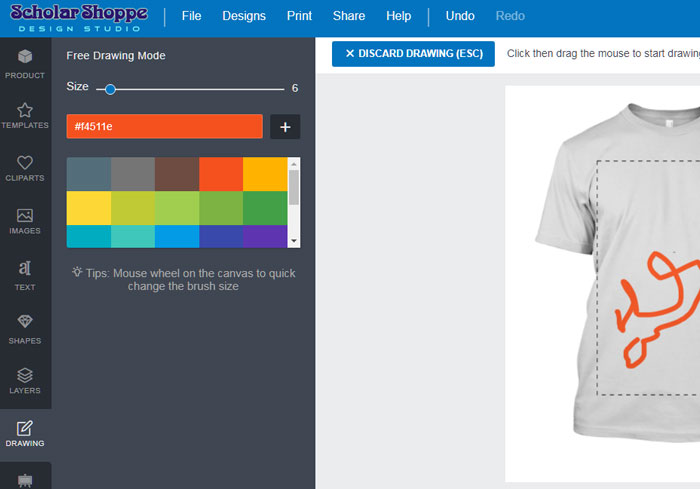
Just click on the color you want to use and drag the mouse pointer or use your fingure tip to draw what you want into the editor area.
Design Area
This is the important part of Scholar Shoppe Design Studio. It is preview and workspace for all layers you added.
To adjust layer, just use the mouse to click on them or select all of them via drag mouse.
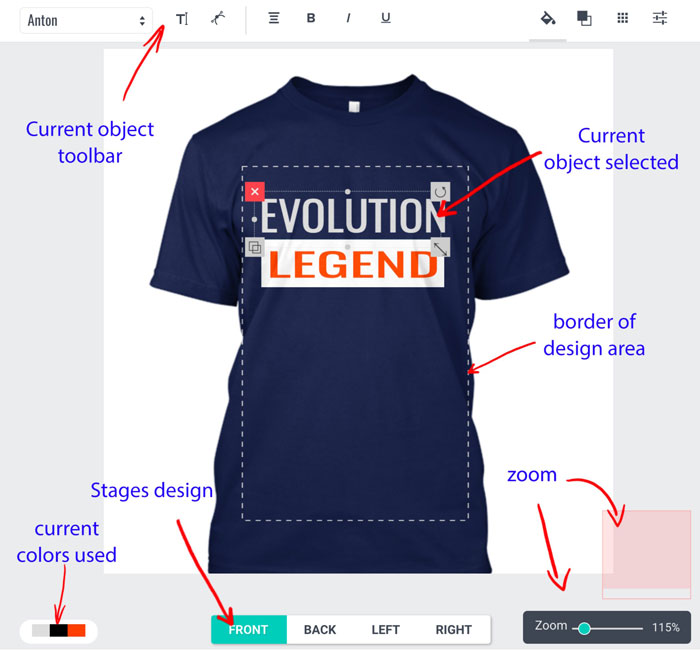
There are parts of design area:
- Current colors : all colors used on this design. Colors extracted from images, text and other resources which inretun used for calculation of the cost.
- Zoom tools
- Stages switcher : switch design view to other stage or product.
- Toolbar: The options for current selected layers.
- Borders of design area: the range of layers arranged
Image toolbar
With an image added into design area. there are some options for it. To enable options, just click on an image and see the top toolbar as bellow:
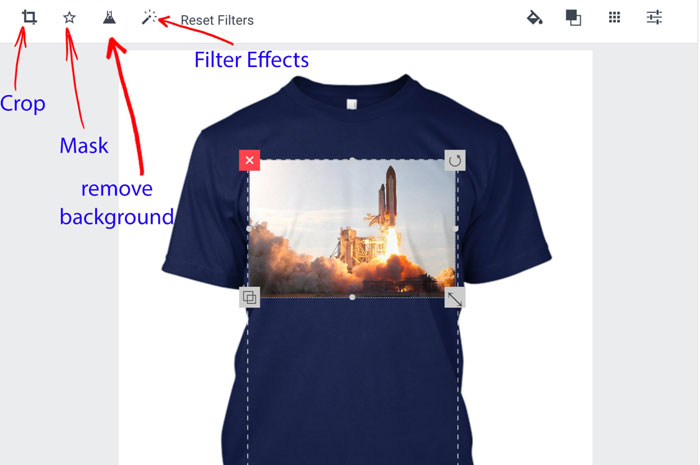
Crop Image

The image will be cropped with the exactly position you put into the viewer.
Image Mask
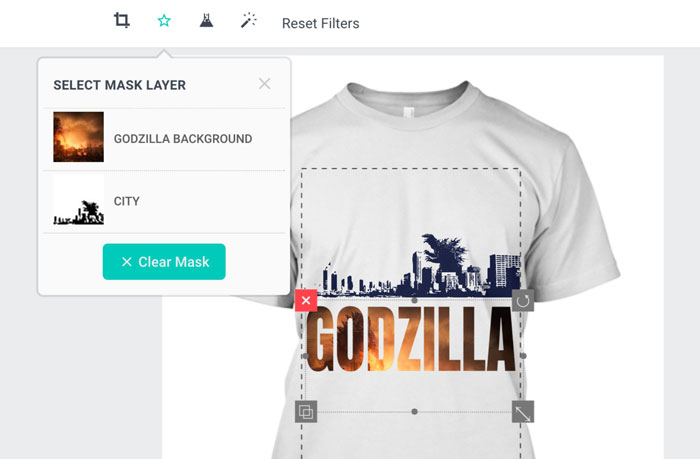
Do you want to make text with complex background from another image?
Yeah, it easily does that with Text Mask feature.
How to create text with mask background? Will update soon.
Remove Background
Sometime you have light or dark background which make image ugly and you want to remove them.
It is easy to do that with this feature.
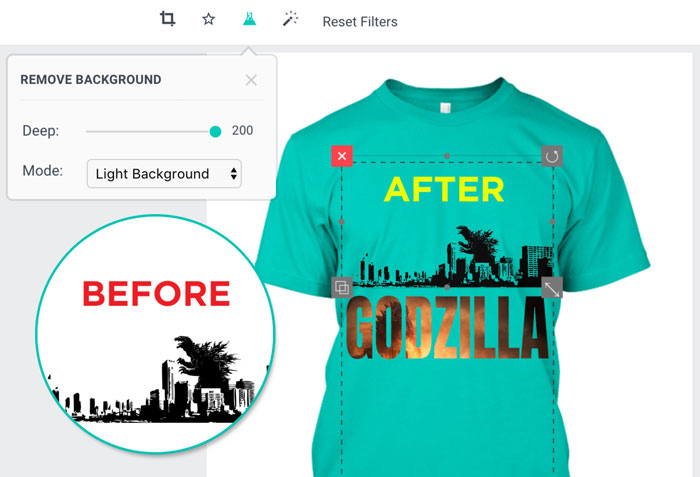
Click on the image and choose the background remove tool from top, then move little the Deep slider towards 0, it will remove the background
Image Filter Effects
This feature helps you make the image have a great effect as a filter of the camera.
There are 20+ effects ready to use.
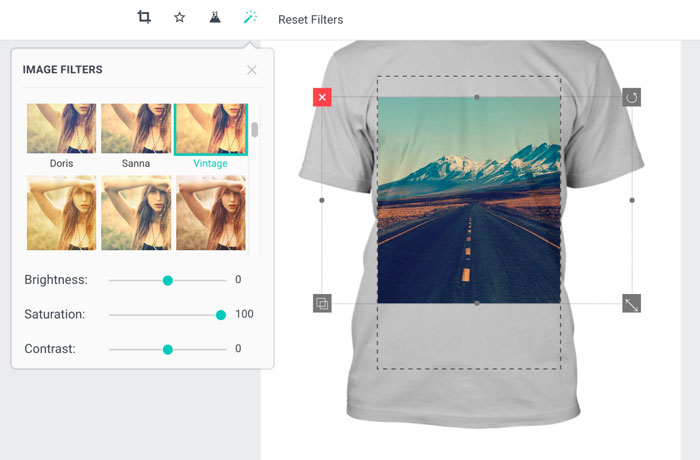
click on effects to apply image effects, use the Brightness, Saturation and Contrast slider to adjust the filter as you need, change if you dont like.
Layout Toolbar
There are set of navigation and layout tools to support you in designing.
Auto Snap
When you move a shape or layers, it will align or “snap to” the nearest intersection of lines in center points, even if the grid is not visible, or snap to other image or layers. If your shape or layers do not move where you want, turn off the Auto Snap options.

Follow steps to work with the tool:
- Deselect all layers.
- The Auto Snap tool will display on top right of design area
- Click on Auto Snap link on toolbar
- Turn the Auto Snap Mode to On
- To disable, just switch Auto Snap Mode to Off
Position
When you want to put layers into the bottom right corner or make it center. It takes you some seconds to do that. But with Layer Position tool, layers are put in the right position with one click.

Follow steps to work with the tool:
- Select layer you want to move
- Click on Position icon on toolbar
- Select position you want to move layer to
Layer Position support positions as the screenshot.
Fill Color
With some object such as shape, image, text. The Fill Color helps users fill a solid color to that objects.

Follow steps to work with the tool:
- Select layer you want to fill color
- Click on Fill Color icon on toolbar
- Select color from preset colors or enter custom value by click on input ‘Click to choose color‘.
- To save custom color just press the plus (+) button next to input.
- Transparent help you change the opacity of filled color with below layers.
- Stroke width + Stroke color help you make the border color for current layer.
Arrange Layers
The Scholar Shoppe Design Studio works base on layers, it means the higher layers were looked first.
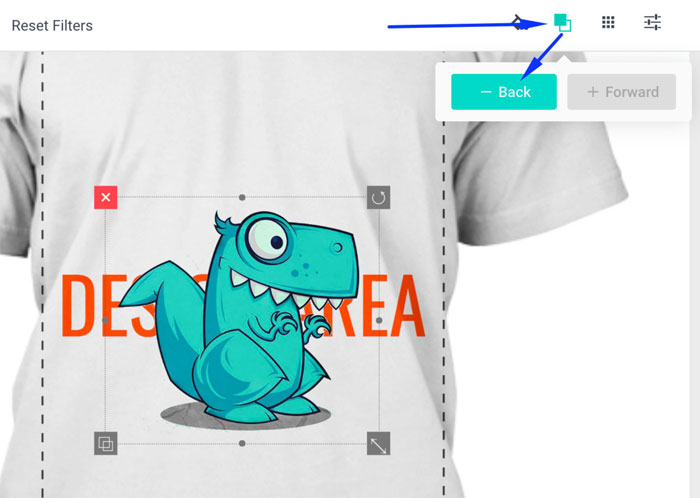
Arrange layers tool helps you change the position of the current layer with other layers. You can set a layer to Forward position or Back position with other ones.
Follow steps to work with the tool:
- Select layer you want to change.
- Click on Arange Layers icon on the toolbar.
- Select Forward or Back action to change order.
You can use the Layer Tab alternatively.
Transforms Manual
When use transform tool directly, it is hard to know how many angles rotated or flipped.
The Scholar Shoppe Design Studio provides a manual way to set transform values for a layer.
![]()
Follow steps to work with the tool:
- Select layer you want to change.
- Click on Transform icon on the toolbar.
- Adjust values you want to set
The values you can set for the object as bellow:
- Rotate : the edge of an object. start from 0 – 360 degree.
- Skew X : skews layer along the X-axis by the given angle.
- Skew Y : skews layer along the Y-axis by the given angle.
- Flip X : Horizontal flip your layer.
- Flip Y : Vertical flip your layer.
Of course, you can cancel all applied values by press the Reset All Transform button.
QRCode
The Scholar Shoppe Design Studio provides a option to generate your own QRCode and add it to your design.
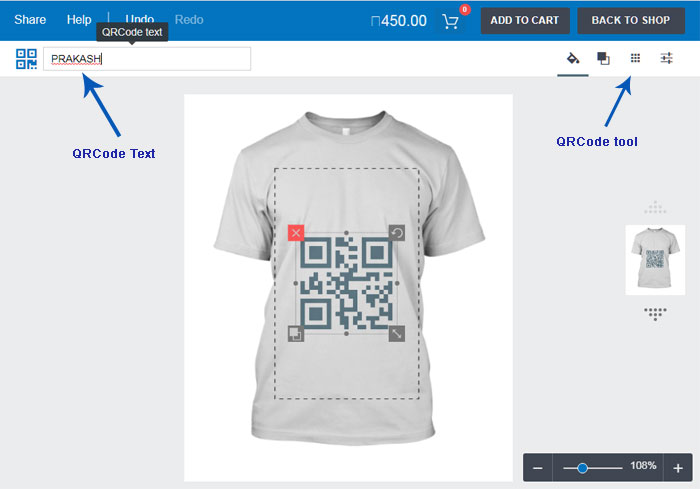
Follow steps to work with the tool:
- Click on QRCode icon on the toolbar.
- Add Text to your QRCode-Text you want to set
Now your QRCode is ready, you can change the colour if you want by selecting it.
Text Toolbar
With a text added into design area. There are some options for it. To enable options, just click on text and see the top toolbar as bellow:

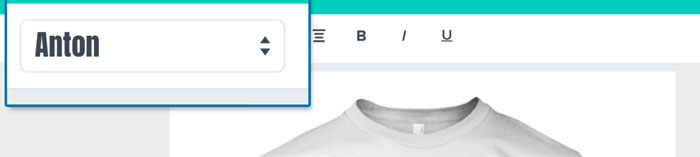
Font Family
This option allows you switch to other front family easily. To use more font, just press the Get More Fonts button.
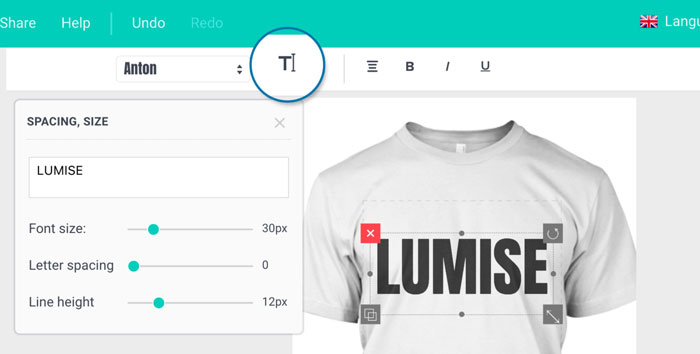
Font Advance
This tools allows you change the font-size, line-height even text content
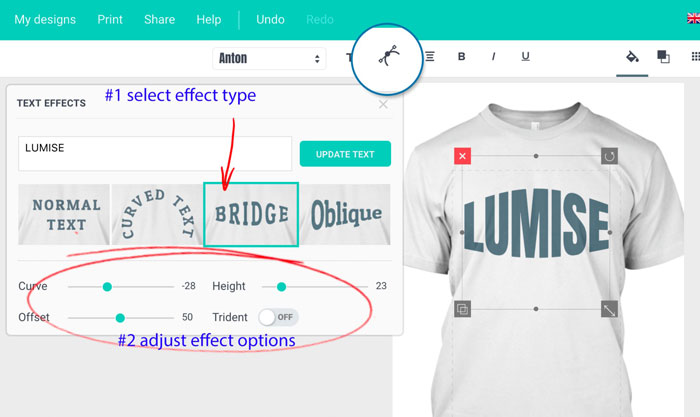
Text Effects
There are some text effects on Scholar Shoppe Design Studio. To access it, just select a text and select Text Effect icon.
Text Style
This options help you change text style as bold, underline, italic or text align as well.

Menu
As an application on the desktop, there are some menus is included on Scholar Shoppe Design Studio.
File

- New Design: Start new empty design for current product.
- Import Design: Import design from your local which you exported from Scholar Shoppe Design Studio
- Clear all: Clear current design to empty
- Save as file: export current content on design area to a file Currently disabled
- Make a Copy: Duplicate your current design content on area to new design
- Download : export your design to other format: SVG, JPG, PNG, JSON, PDF Currently disabled
My Designs
This is management of all your designs on current PC
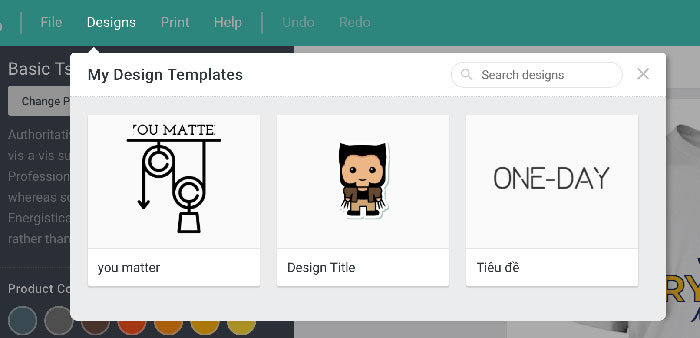
With each design, you can duplicate or focus edit and delete it.
To start new design just press on New Design button
Print current your design to printing devices, Currently disabled

Just select a size or add your custom size to print or download result.
Help
Some guide for you to use Scholar Shoppe Design Studio easier.
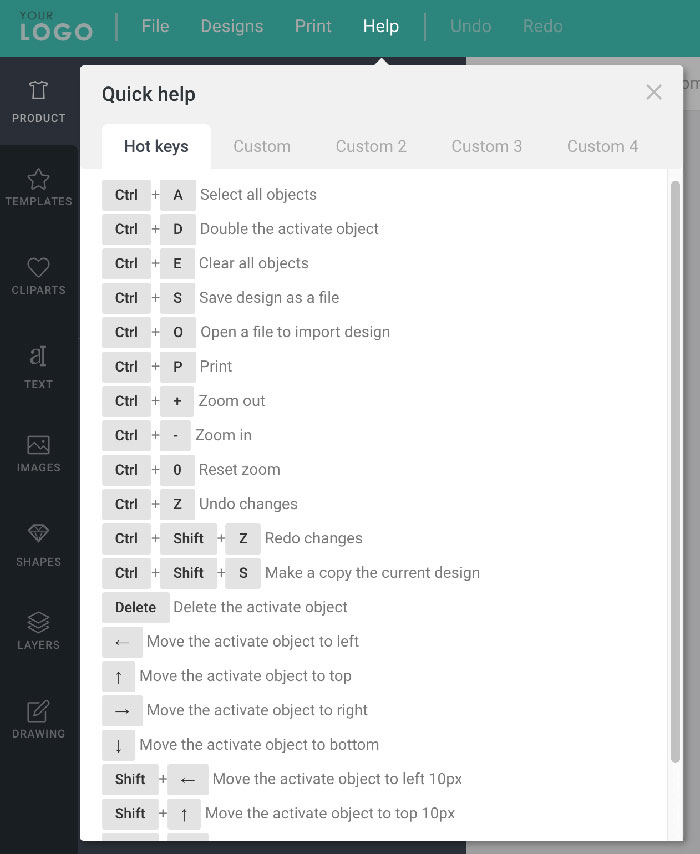
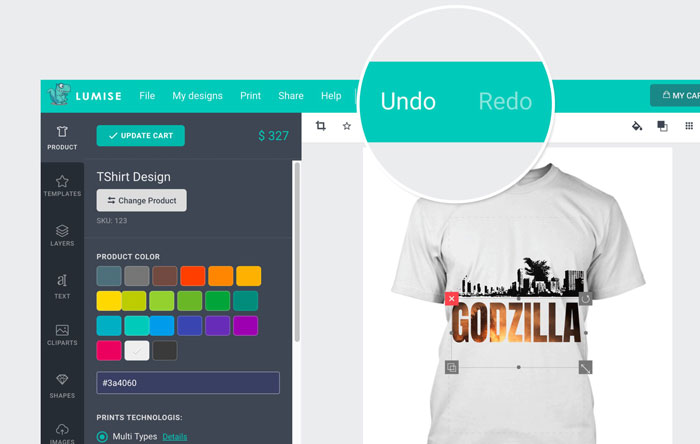
Undo/Redo
This is greatly featured on Scholar Shoppe Design Studio, you can track back to your works easier.
Cart Languages
Cart
This is preview cart with cart items you added. To view more details on the cart just press View Details button.
In the View Details popup, you can see more details for a product such as an attribute selected, the price for each them and subtotal price, total price as well.
To go to checkout, please press the Checkout button.

Languages
When admin enable the Allow users change settings user can switch to other languages with dropdown as screenshot
